How To Create Instagram Story Highlight Covers (without posting to your story!)


Switching things up today with a non-food related blog post! I wanted to update my Instagram story highlights last night with cute little covers. I’ve been wanting to do this for awhile but didn’t want to be THAT person that adds 15 slides to their actual story and annoys everyone. Luckily a sweet follower told me that you don’t actually have to upload them to your story. So I wanted to share an easy tutorial of how I made them and uploaded them to save you all the trouble (and to keep you from annoying your friends haha). Here’s a quick how to create Instagram story highlight covers without posting them to your story 🙂

Okay so I’m going to break it down step by step with pictures.
1) I used the website Canva but the app version to make the story cover. Just search the app store “canva”. Download it to your phone.

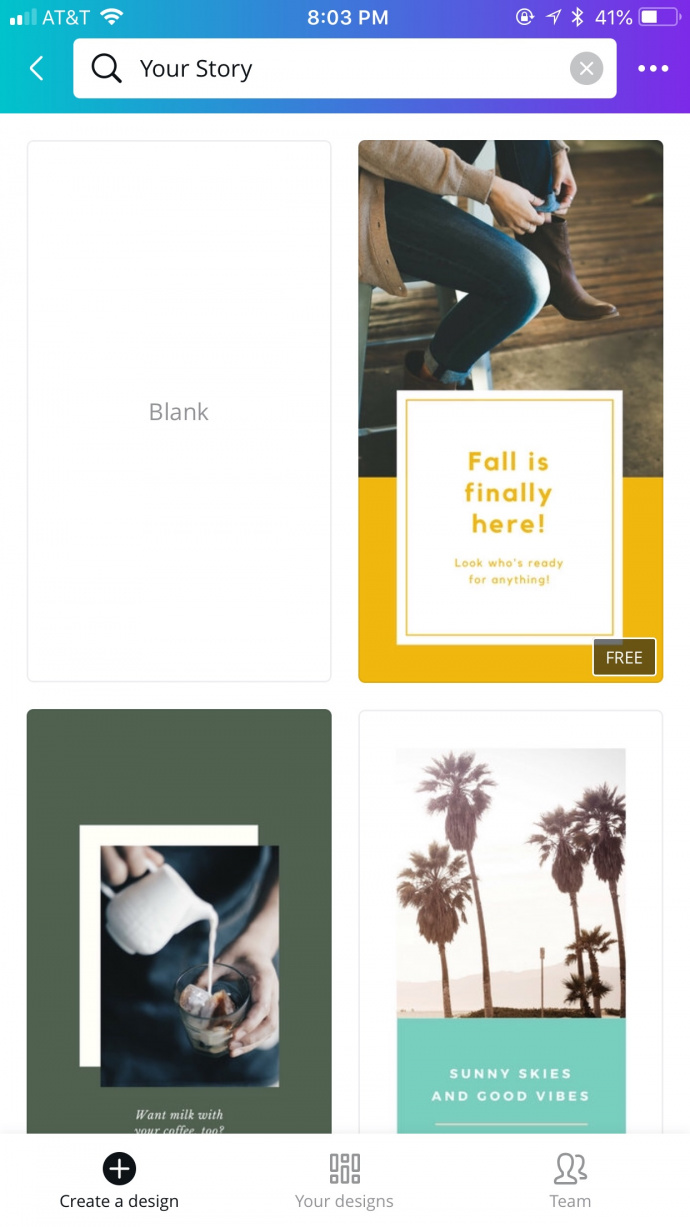
2) Open the app, create an account if you don’t already have one. It’s nice because you can save your designs and reuse them. You can also create a brand color to make things more cohesive across your blog and Instagram. Anyways, create an account then scroll down the main page until you see “Your Story” that’s the size you need for these graphics.

3) Select “see all” in the corner and it will take you to a page showing you a bunch of templates. I used the blank template because it’s the easiest to customize. Click on the blank template.
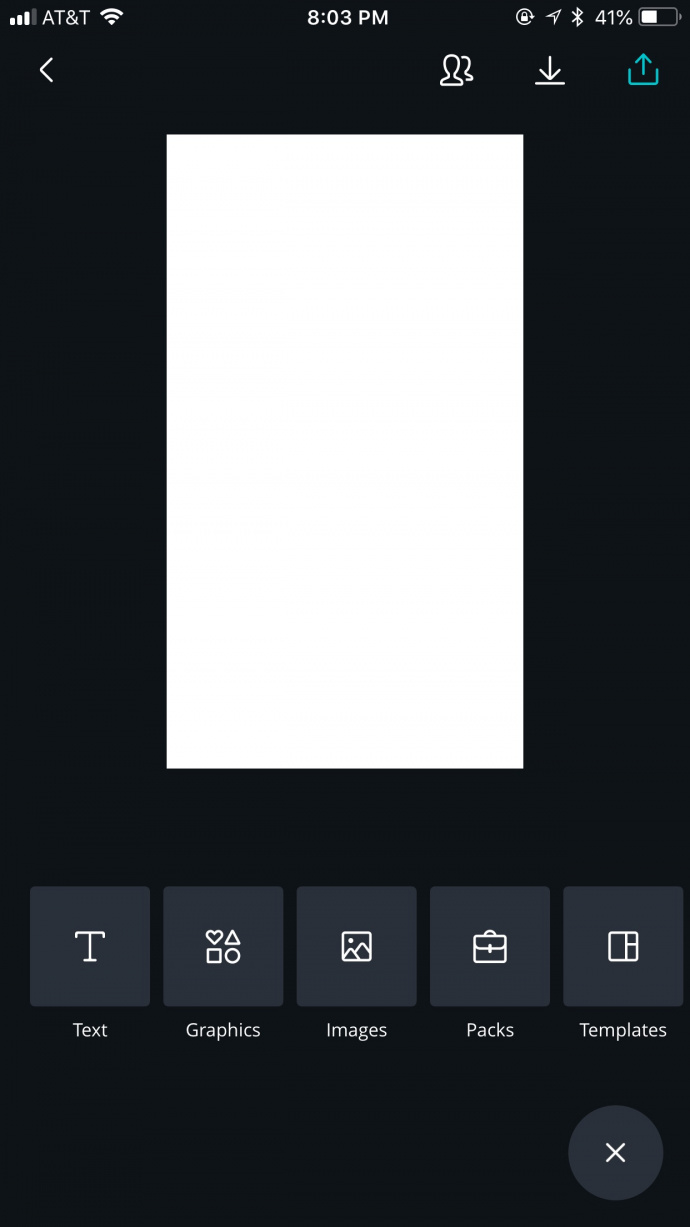
4) It will take you to the blank template and then you’ll need to tap it to start editing. Now is where you get to customize it! Select a background color that works best for your profile. Play around with it. If you have a saved color number you like to use, you can also add it in.

5) Once you choose a color, click the plus sign in the bottom right corner. You’ll see an option to add text, graphics, images, and more. I’m going to show you how I added text because that’s what I used this app for. But if you all are interested in seeing how to do it with an image, let me know!
6) So you’re going to select the text and then scroll through the templates and find one that you like. I choose one that I liked the top text and then I deleted the bottom text.
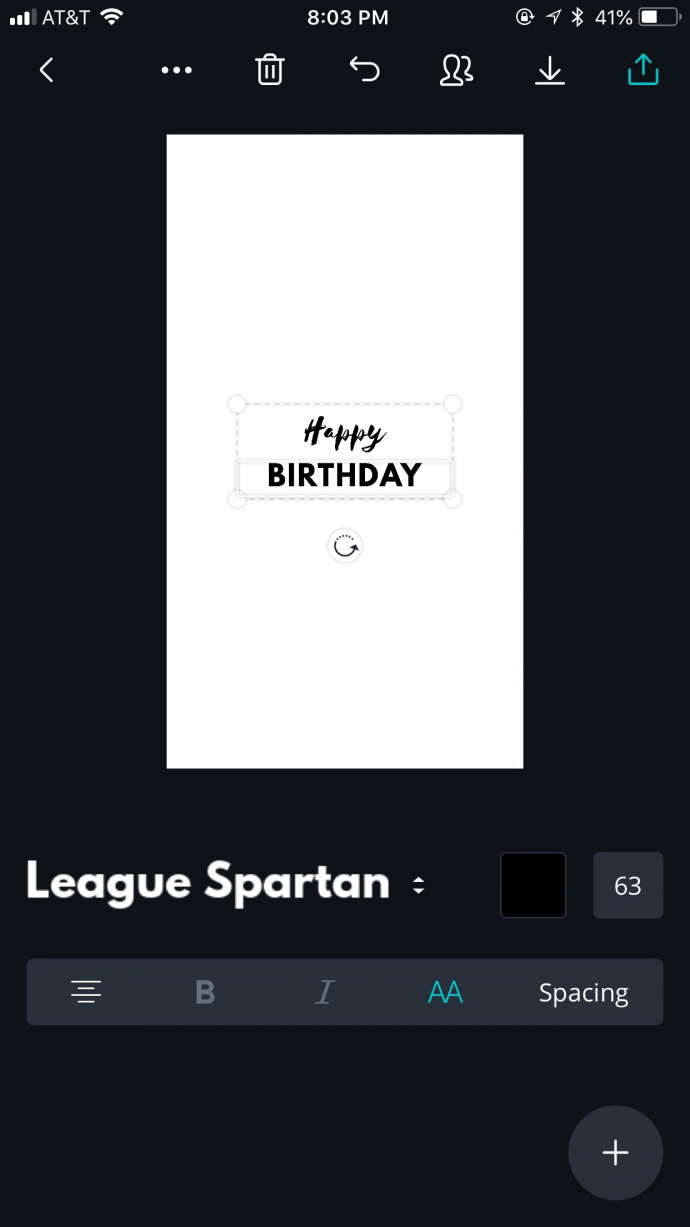
7) You can go through and change the font that you want, the size of the font, and the color. I was worried about the font being too big to fit in the little circle that Instagram gives you to display the text. You can zoom in on the text on Instagram so I recommend making it smaller and then you can zoom in on it to size it to your liking.
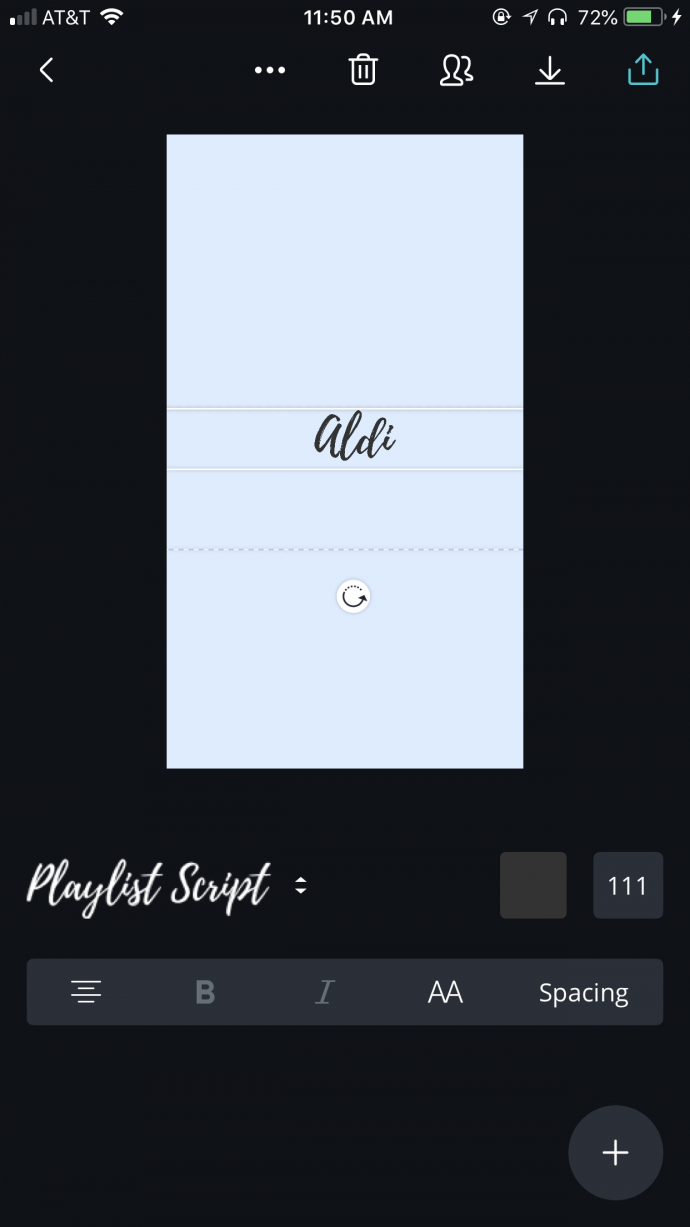
8) So as you can see I created an “Aldi” highlight cover for my Aldi saved story. I changed the font color, the font script, and the size. I made it smaller so I could zoom in on it. Then you’ll hit the save button, the down arrow two from the right in the top right corner. This saves the image to your camera roll.
Now it’s time to upload our cute cover to our Instagram highlight.
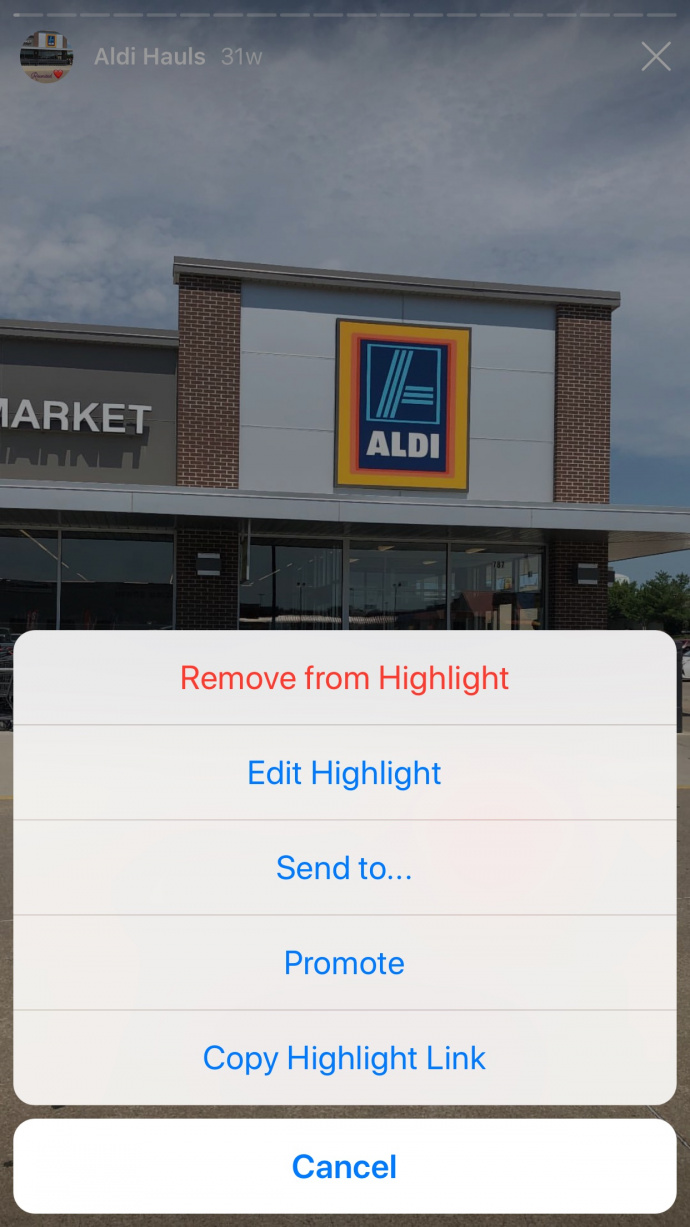
9) Go to your Instagram app and go to one of your highlights. So I went to my already created “Aldi” highlight.
10) You’ll click on the story highlight, click edit highlight.
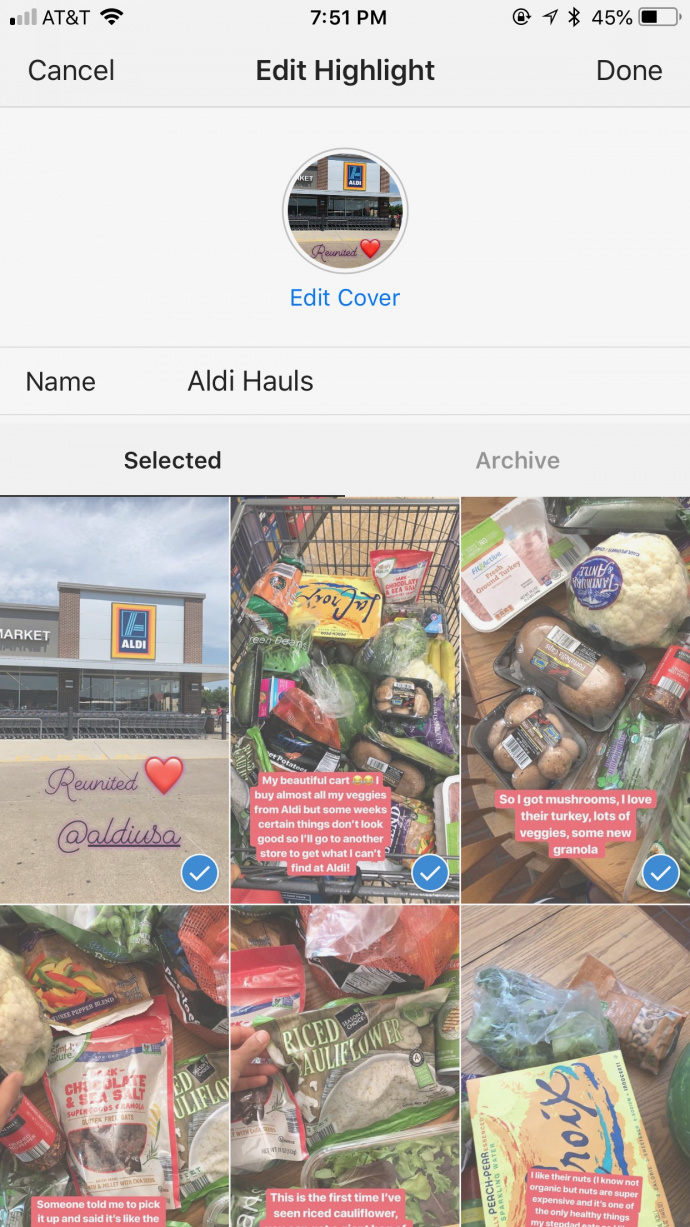
11) Click edit cover underneath the little icon on top.
12) Scroll all the way to left to the little mountain icon. Click on this- this is how you upload from your camera roll instead of your actual Instagram story.
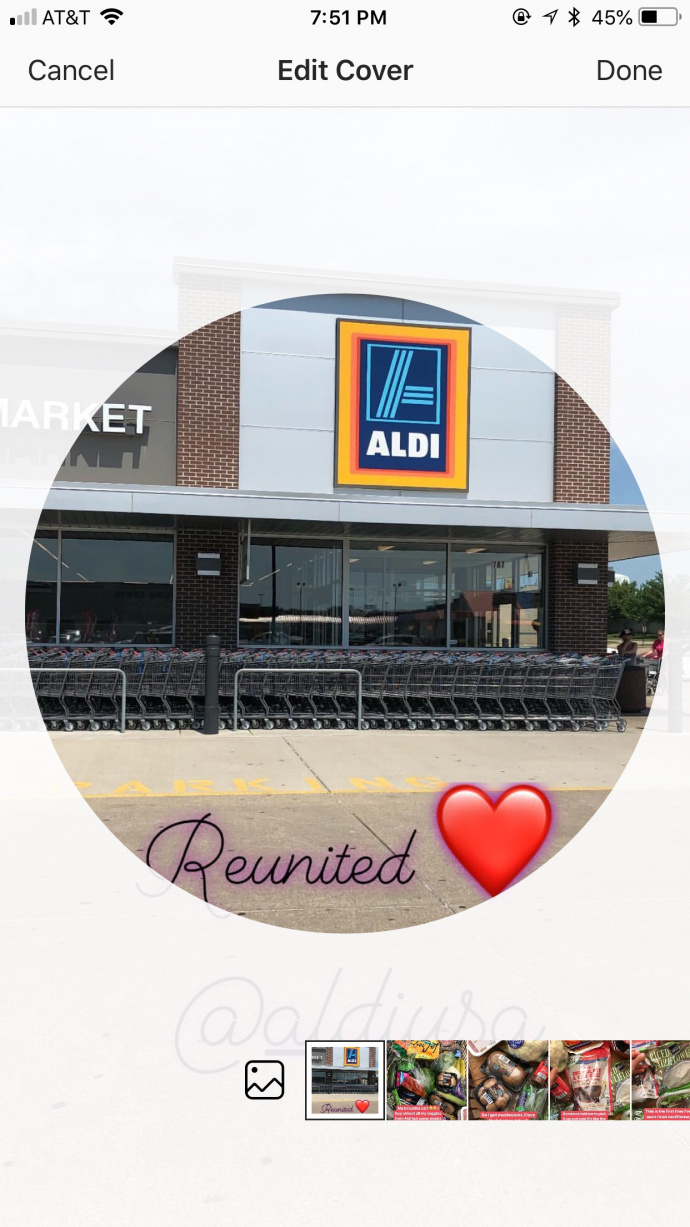
13) Select the cover you just created on Canva and resize it by zooming to get it centered and the size you want. Click save and you’re good to go!
Now just repeat the process. You can copy the template you made on Canva and just change the text to save you work for your other highlight covers. I created all my covers at once then went and uploaded them all.
Let me know if this step by step was helpful for you and if you want to see any more Instagram tips and tricks!

